How To Draw A Bunny So Nude, It's Shockingly Simple (You Won't Believe This!)
Have you ever looked at a cute bunny and thought, "I wish I could draw that"? Well, you're not alone! Many people find drawing animals intimidating, especially when it comes to capturing their natural form. But what if I told you that drawing a bunny can be surprisingly simple? In fact, this method is so straightforward that you'll be amazed at how quickly you can create a beautiful bunny drawing. Whether you're a complete beginner or someone looking to improve your skills, this guide will walk you through the process step-by-step, making it accessible to everyone. By the end of this article, you'll have the confidence to draw a bunny that's not only adorable but also anatomically correct—no clothing required!
What Makes Bunny Drawing So Accessible?
Drawing doesn't have to be complicated or require expensive tools. Thanks to modern technology, there are now free online drawing applications available for all ages that make the process incredibly accessible. These digital platforms allow you to create stunning artwork without the need for traditional art supplies. You can experiment with different styles, undo mistakes instantly, and even share your creations with others online.
The beauty of these applications lies in their versatility. They support various export formats like JPEG, PNG, SVG, and PDF, making it easy to save and share your work across different platforms. Whether you're creating digital artwork to share on social media or designing a custom greeting card, these tools have got you covered. The intuitive interfaces mean that even if you've never held a digital pen before, you can start creating impressive artwork within minutes.
Getting Started with Digital Bunny Drawing
To begin your bunny drawing journey, you'll need to choose the right tool for the job. There are several excellent free online drawing applications available, each with its own unique features. Some popular options include Sketchpad, which we'll focus on in this guide, as well as other browser-based drawing tools that offer similar functionality.
Once you've selected your drawing application, it's time to familiarize yourself with the basic tools. Most digital drawing platforms include essential features like brush selection, color palettes, and layering options. Take a few minutes to explore these tools and understand how they work. Many applications also offer tutorials or guided tours to help new users get started quickly.
One of the most useful features in digital drawing applications is the ability to use keyboard shortcuts. For example, in Sketchpad, you can press the "S" key to quickly access the style chooser. This can save you valuable time as you work on your bunny drawing. Additionally, many applications allow you to create custom tool presets by combining different settings, which can be accessed through specific finger combinations on touch devices.
- 3 Jane Does Secret Life The Hidden Story That Will Change Everything You Thought You Knew
- Julai Cash Leak The Secret Video That Broke The Internet
- The Nina Altuve Leak Thats Breaking The Internet Full Exposé
The Step-by-Step Bunny Drawing Process
Now that you're familiar with your drawing tools, let's dive into the actual process of drawing a bunny. We'll break this down into simple, manageable steps that anyone can follow:
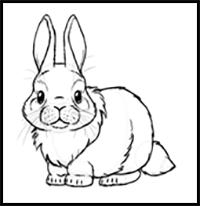
Step 1: Basic Shapes
Start by sketching the basic shapes that will form your bunny's body. Use circles for the head and body, and ovals for the ears and feet. Don't worry about making these perfect—they're just guidelines to help you establish proportions.
Step 2: Connecting the Shapes
Once you have your basic shapes in place, begin connecting them to form the bunny's body. Pay attention to how the head connects to the neck and how the body flows into the legs. This is where your bunny will start to take shape.
Step 3: Adding Details
Now it's time to add the distinctive features that make a bunny recognizable. Draw the ears, making sure they're proportional to the head. Add the eyes, nose, and mouth, keeping in mind that bunnies have relatively large eyes and a small, triangular nose.
Step 4: Refining the Outline
Go over your sketch and refine the outline of your bunny. Smooth out any rough lines and adjust proportions as needed. This is also the time to add any unique characteristics you want your bunny to have, like a fluffy tail or distinctive markings.
Step 5: Adding Texture and Shading
To give your bunny a more realistic appearance, add some texture to its fur. Use short, quick strokes to suggest the direction of the fur growth. Add some shading to give your bunny depth and dimension, paying attention to where light would naturally fall on its body.
Advanced Techniques and Tips
As you become more comfortable with the basic bunny drawing process, you might want to explore some advanced techniques to take your artwork to the next level. One effective method is to study reference photos of real bunnies to understand their anatomy and movement better. Pay attention to how their bodies bend and stretch, and how their fur lays in different positions.
Another valuable technique is to experiment with different drawing styles. You might try creating a more cartoonish version of your bunny with exaggerated features, or a highly realistic one with intricate details. Many digital drawing applications offer various brush styles that can help you achieve different effects, from soft watercolor looks to bold, graphic lines.
Don't be afraid to make mistakes during this process. One of the greatest advantages of digital drawing is the ability to undo and redo as much as you need. Take advantage of this feature to try different approaches and find what works best for you. Remember, every artist develops their own unique style over time, so embrace the learning process and enjoy the journey of improvement.
Sharing and Exporting Your Bunny Artwork
Once you've completed your bunny drawing, you'll likely want to share it with others or use it in various projects. This is where the export capabilities of your drawing application become invaluable. Most platforms allow you to save your artwork in multiple formats:
- JPEG: Ideal for sharing on social media or websites
- PNG: Perfect for maintaining transparency in your images
- SVG: Great for scalable vector graphics that won't lose quality when resized
- PDF: Useful for printing or including in documents
When exporting your artwork, consider the intended use. For online sharing, JPEG or PNG might be the best choice due to their compatibility with most platforms. If you're planning to print your bunny drawing, you might want to export a high-resolution version to ensure the best quality.
Many artists also choose to create time-lapse videos of their drawing process, which can be fascinating to watch and share with others. Some drawing applications include this feature, allowing you to record your entire creative journey from start to finish.
Troubleshooting Common Challenges
Even with the best tools and techniques, you might encounter some challenges while drawing your bunny. Here are some common issues and how to address them:
Proportional Problems
If your bunny's head looks too big or its legs seem too short, try using the grid method. Many drawing applications offer grid overlays that can help you maintain proper proportions as you work.
Fur Texture Issues
Achieving realistic fur texture can be tricky. If you're struggling, try using a smaller brush size and building up the texture gradually with multiple layers. Pay attention to the direction of fur growth and vary your stroke lengths for a more natural look.
Expression Difficulties
Getting the right expression in your bunny's eyes and mouth can make a big difference in the overall feel of your drawing. If you're having trouble, study photos of real bunnies or even your own pet if you have one. Notice how their expressions change in different situations.
Exploring Other Drawing Opportunities
Now that you've mastered the basics of bunny drawing, why stop there? Digital drawing applications open up a world of creative possibilities. You might want to try drawing other animals, creating character designs, or even exploring abstract art. The skills you've developed while drawing your bunny—such as understanding proportions, working with layers, and using different brush techniques—will serve you well in any artistic endeavor.
Many drawing platforms also offer community features where you can connect with other artists, share your work, and get feedback. This can be incredibly valuable as you continue to develop your skills and find your artistic voice. Don't hesitate to participate in online art challenges or themed drawing events to push yourself creatively and see how others approach similar subjects.
Conclusion
Drawing a bunny might seem like a simple task, but as we've explored in this guide, there's actually a lot to consider—from choosing the right tools to mastering various techniques and sharing your finished artwork. The beauty of digital drawing is that it makes this process accessible to everyone, regardless of their prior experience or access to traditional art supplies.
Remember, the key to improving your drawing skills is consistent practice and a willingness to experiment. Don't be discouraged if your first few attempts don't turn out exactly as you envisioned. Every artist, no matter how experienced, continues to learn and grow throughout their creative journey. The most important thing is to enjoy the process and have fun bringing your ideas to life on the digital canvas.
So why not give it a try? Open up that drawing application, follow the steps we've outlined, and create your own adorable, nude bunny drawing. You might be surprised at how satisfying and rewarding the experience can be. Happy drawing!