How To Put Artificial Lashes: The Ultimate Guide To Flawless Application
Have you ever wondered how celebrities and influencers achieve those stunning, eye-catching lashes that seem to captivate everyone in the room? The secret isn't just genetics—it's the art of applying artificial lashes. Whether you're a complete beginner or someone who's struggled with falsies in the past, learning how to put artificial lashes can transform your makeup routine and elevate your entire look. In this comprehensive guide, we'll walk you through everything you need to know about applying false eyelashes, from selecting the right pair to mastering the perfect application technique.
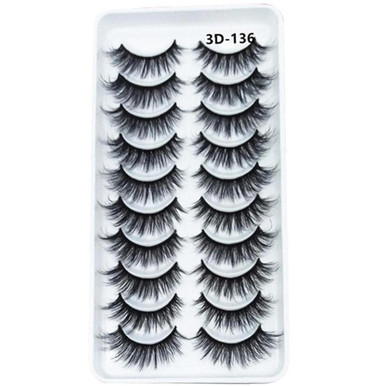
Understanding Artificial Lashes and Their Benefits
False eyelashes are a fun, simple way to mix up your normal style and bring more attention to your eyes. They can instantly enhance your natural beauty, making your eyes appear larger, more defined, and dramatically captivating. The beauty of artificial lashes lies in their versatility—whether you're going for a natural, everyday look or a glamorous, red-carpet-ready appearance, there's a perfect pair of falsies for every occasion.
The application process might seem intimidating at first, but once you understand the basics, you'll find that putting on artificial lashes is incredibly accessible. Most celebrities, influencers, and makeup artists will use false eyelashes to complete a look—so the real question is, how do you put on fake eyelashes? The answer is simpler than you might think, and with practice, you'll be applying them like a pro in just minutes.
Essential Tools and Preparation
Before diving into the application process, it's crucial to gather all the necessary tools and prepare your natural lashes properly. Learn how to apply false lashes with a complete beginners' guide that covers all the essentials. Here's what you'll need:
- Tweezers or a lash applicator for precise placement
- Individual lash adhesive or strip lash glue (we'll discuss the best options later)
- A high-quality mirror, preferably magnifying
- A spoolie brush to blend your natural and false lashes
- Makeup remover and cotton pads for cleanup
Get to know which tools and techniques you need for a flawless application. Clean your eyelids and natural lashes thoroughly to remove oils or makeup residue, so the adhesive sticks better. This preparation step is crucial because any oil or leftover makeup can prevent the lashes from adhering properly, causing them to lift or fall off prematurely.
Step-by-Step Application Process
Now that you're prepared, let's dive into the easiest way to apply falsies! The process is straightforward when broken down into manageable steps:
- Kaliknockers
- The Shocking Truth About Christopher Gavigan Leaked Documents Expose Everything
- Shocking Leak Canelos Secret Plan To End Crawfords Career You Wont Believe This
1. Measure and Trim Your Lashes
Most false lashes come in standard sizes that may be too long for your eye shape. Hold the lash strip against your eyelid and trim any excess from the outer corner. This ensures a comfortable fit and prevents the corners from lifting throughout the day.
2. Apply the Adhesive
This is where many beginners struggle, but we've got you covered with pro tips. Apply a thin, even line of lash glue along the entire band of the false lashes. Wait about 30-60 seconds for the glue to become tacky—this is crucial for proper adhesion. The best glue to use will depend on your needs, but look for latex-free options if you have sensitive eyes.
3. Placement Technique
Look down into a mirror rather than straight ahead or upward. This position allows you to see your lash line clearly while keeping your eye open. Using tweezers or your fingers, place the lash strip as close to your natural lash line as possible, starting from the center and then securing the inner and outer corners.
4. Secure and Blend
Once the lash is in place, use the end of your tweezers to gently press along the band, ensuring every part adheres properly. Look straight ahead into the mirror and squeeze false lashes gently to secure them. Use a clean spoolie brush to blend your natural lashes with the false ones for a seamless look.
Mastering Advanced Techniques
For those ready to take their lash game to the next level, let's explore some advanced techniques. Master placement, adhesive tips, and blending techniques that professionals use. One pro tip is to apply a thin line of black eyeliner along your lash line before applying falsies—this helps camouflage the band and creates a more natural appearance.
Another technique involves using individual lashes or premade lash fans instead of strip lashes. Discover everything beginners need to know about premade lash fans, including their benefits and application methods. These create a more customizable, natural-looking effect and are perfect for those who find strip lashes challenging.
Common Mistakes and How to Avoid Them
Even with the best techniques, mistakes can happen. Here are some common issues and solutions:
Lashes popping up at the corners: This usually happens when you don't wait long enough for the glue to become tacky or when you don't secure the corners properly. Always wait 30-60 seconds after applying glue before placement.
Visible lash band: If the band is visible, try using a thinner strip lash or applying eyeliner over the band after application. Some people also use dark-toned lash glue for a more seamless blend.
Lashes feeling heavy or uncomfortable: This often occurs when the lashes are too long or thick for your eye shape. Always measure and trim your lashes, and consider your natural lash strength when selecting falsies.
Removal and Aftercare
Knowing how to properly remove your artificial lashes is just as important as applying them. From picking the right fake lashes to how to properly remove them, we have it covered! Never pull off your lashes without loosening the adhesive first, as this can damage your natural lashes.
Use an oil-based makeup remover or a specialized lash adhesive remover. Apply it along the lash band and wait a few minutes for the glue to dissolve. Gently peel the lashes from the outer corner inward. After removal, clean your false lashes with makeup remover and store them properly for reuse.
Safety Considerations and Alternatives
While artificial lashes can be a game-changer for your makeup routine, it's important to be aware of potential risks. Fake eyelashes can irritate eyes, trigger allergies, and weaken natural lashes. Here's what the risks actually look like and how to minimize them:
Always perform a patch test with new lash glue to check for allergies. If you experience redness, itching, or swelling, discontinue use immediately. Avoid sharing lashes with others to prevent eye infections. Give your natural lashes breaks between applications to maintain their health.
For those with extremely sensitive eyes or concerns about traditional falsies, consider alternatives like magnetic lashes or lash extensions applied by professionals. These options can provide similar dramatic effects with different application methods and maintenance requirements.
Conclusion
Learning how to put artificial lashes doesn't have to be intimidating. With the right tools, techniques, and a bit of practice, you can master this skill and transform your makeup routine. Remember that even professionals started as beginners, so don't get discouraged if your first attempts aren't perfect. The key is to be patient with yourself and keep practicing.
Whether you're preparing for a special occasion, wanting to enhance your everyday look, or simply exploring new makeup techniques, artificial lashes offer endless possibilities for creative expression. By following this comprehensive guide, you're well on your way to achieving those stunning, eye-catching lashes that frame your eyes beautifully and boost your confidence. Happy lashing!