SHOCKING: Water Shut Off Valve Leaks Exposed – What They're Hiding From You!
Have you ever heard that annoying drip-drip sound coming from your bathroom or kitchen? That seemingly harmless noise could be costing you hundreds of dollars annually and causing hidden damage to your home. Water shut off valve leaks are one of the most common yet overlooked plumbing issues that homeowners face, and what they're hiding from you might shock you! These small leaks can waste thousands of gallons of water each year, drive up your utility bills, and create the perfect environment for mold growth and structural damage. But don't panic – understanding the truth about these leaks is the first step to taking control of your home's plumbing health.
Understanding Water Shut Off Valve Leaks
Water shut off valve leaks represent a significant plumbing concern that affects millions of households across the country. These leaks occur when the valve mechanism fails to create a proper seal, allowing water to escape even when the valve is in the closed position. The problem is more widespread than most homeowners realize, with industry experts estimating that the average household wastes approximately 10,000 gallons of water annually due to various leaks – and shut off valve leaks contribute substantially to this figure.
The insidious nature of these leaks makes them particularly problematic. Unlike a burst pipe that demands immediate attention, shut off valve leaks often develop gradually, allowing them to persist for months or even years before being detected. During this time, they silently erode your home's infrastructure, damage surrounding materials, and create conditions that promote the growth of harmful microorganisms. What makes this situation even more concerning is that many homeowners remain completely unaware of these leaks until they receive an unusually high water bill or discover water damage during routine maintenance.
- Andrea Elson
- Peitners Shocking Leak What Theyre Hiding From You
- Gretchen Corbetts Secret Sex Scandal Exposed The Full Story
Common Causes of Shut Off Valve Leaks
Before we dive into the repair process, it's essential to understand why these leaks occur in the first place. The very first, and most crucial, step is to cut off the water supply to your entire home before attempting any diagnosis or repair. This prevents further water damage and ensures your safety while working on the plumbing system.
Shut off valves fail for several reasons, with age being the primary culprit. Most valves contain rubber washers or O-rings that deteriorate over time due to constant water pressure and mineral buildup. These components typically last 10-15 years under normal conditions, but factors like water quality, usage frequency, and installation quality can significantly impact their lifespan. Hard water areas experience accelerated wear due to mineral deposits that accumulate on valve components, creating friction and preventing proper sealing.
Physical damage represents another common cause of valve leaks. Valves can become compromised through accidental impact, improper installation, or excessive force during operation. The delicate internal mechanisms are particularly vulnerable to damage from over-tightening, which can warp components and prevent them from seating correctly. Additionally, temperature fluctuations cause metal components to expand and contract, potentially creating microscopic gaps that allow water to escape.
Corrosion poses a significant threat, especially in older homes with metal piping systems. Over time, electrochemical reactions between different metals in the plumbing system can create galvanic corrosion, weakening valve bodies and connections. This process is accelerated in areas with high humidity or where valves are exposed to harsh chemicals or cleaning agents.
Identifying the Source of the Leak
Identify the source of the leak before attempting any repairs. This critical step can save you time, money, and frustration by ensuring you address the actual problem rather than treating symptoms. Start by examining the valve body for visible signs of water accumulation, rust, or mineral deposits. These indicators often reveal the leak's location and severity.
A systematic approach to leak identification involves checking multiple potential sources. Begin with the valve stem, where the handle connects to the internal mechanism. This area commonly develops leaks due to worn packing nuts or deteriorated stem seals. Next, inspect the valve body for cracks or corrosion, particularly around threaded connections where pipes meet the valve. Don't forget to check the outlet side, as pressure fluctuations can cause leaks to manifest in different locations depending on water flow conditions.
Sometimes, the leak's source isn't immediately visible. In these cases, use a dry paper towel or tissue to systematically wipe around suspected areas, watching for moisture absorption. This technique can reveal subtle leaks that might otherwise go unnoticed. Pay special attention to the valve's base where it connects to the pipe, as this junction often experiences the most stress and is prone to developing leaks over time.
When Should I Hire a Professional Plumber for Valve Leaks?
Hire a professional if leaks persist despite DIY efforts or if you lack the necessary tools or expertise to perform the repair safely. While many shut off valve leaks can be resolved through DIY methods, certain situations demand professional intervention to prevent further damage or ensure proper repair.
Consider hiring a licensed plumber when you encounter the following scenarios: multiple leaks throughout your plumbing system, signs of extensive corrosion or damage to the valve body, leaks that continue after replacing washers and seals, or when the valve is located in a difficult-to-access area. Professional plumbers bring specialized tools, extensive experience, and the ability to diagnose underlying issues that might not be apparent to the average homeowner.
The cost-benefit analysis of DIY versus professional repair often favors expert intervention in complex situations. While DIY repairs might seem economical initially, improper repairs can lead to more extensive damage, higher water bills, and potential code violations. Professional plumbers also provide warranties on their work, giving you peace of mind and protection against future problems.
DIY Repair Process for Shut Off Valve Leaks
Fortunately, repairing this common plumbing issue is often a straightforward DIY task that can save you money and prevent further complications. With the right tools and approach, you can resolve many shut off valve leaks without professional assistance. However, success requires careful preparation, patience, and attention to detail.
Start by gathering necessary tools and materials: adjustable wrenches, screwdrivers, replacement washers or O-rings, plumber's tape, and cleaning supplies. Having everything ready before beginning prevents interruptions and ensures a smooth repair process. Next, document the valve's current configuration with photos or notes, as this reference will prove invaluable during reassembly.
The repair process typically involves disassembling the valve, inspecting all components for wear or damage, replacing faulty parts, and reassembling the unit. Throughout this process, maintain organization by keeping track of removed parts and their orientation. Clean all components thoroughly before reassembly to remove mineral deposits and debris that could interfere with proper sealing.
Safety Precautions and Preparation
Shut off valves aren't built to last forever, and neither are most plumbing fixtures. This fundamental truth underscores the importance of safety precautions when working on plumbing repairs. Before beginning any repair work, ensure you have the proper safety equipment and understand the risks involved.
Personal protective equipment is essential for plumbing repairs. Wear safety glasses to protect your eyes from debris and potential water spray. Use work gloves to protect your hands from sharp edges and provide better grip on wet components. Consider wearing old clothing, as plumbing work often involves contact with dirty water and debris.
Electrical safety is paramount when working near plumbing fixtures. Water and electricity create a dangerous combination, so ensure all nearby electrical outlets and appliances are protected from potential water exposure. If you must work in areas with electrical components, consider turning off the relevant circuit breakers as an extra precaution.
Step-by-Step Repair Instructions
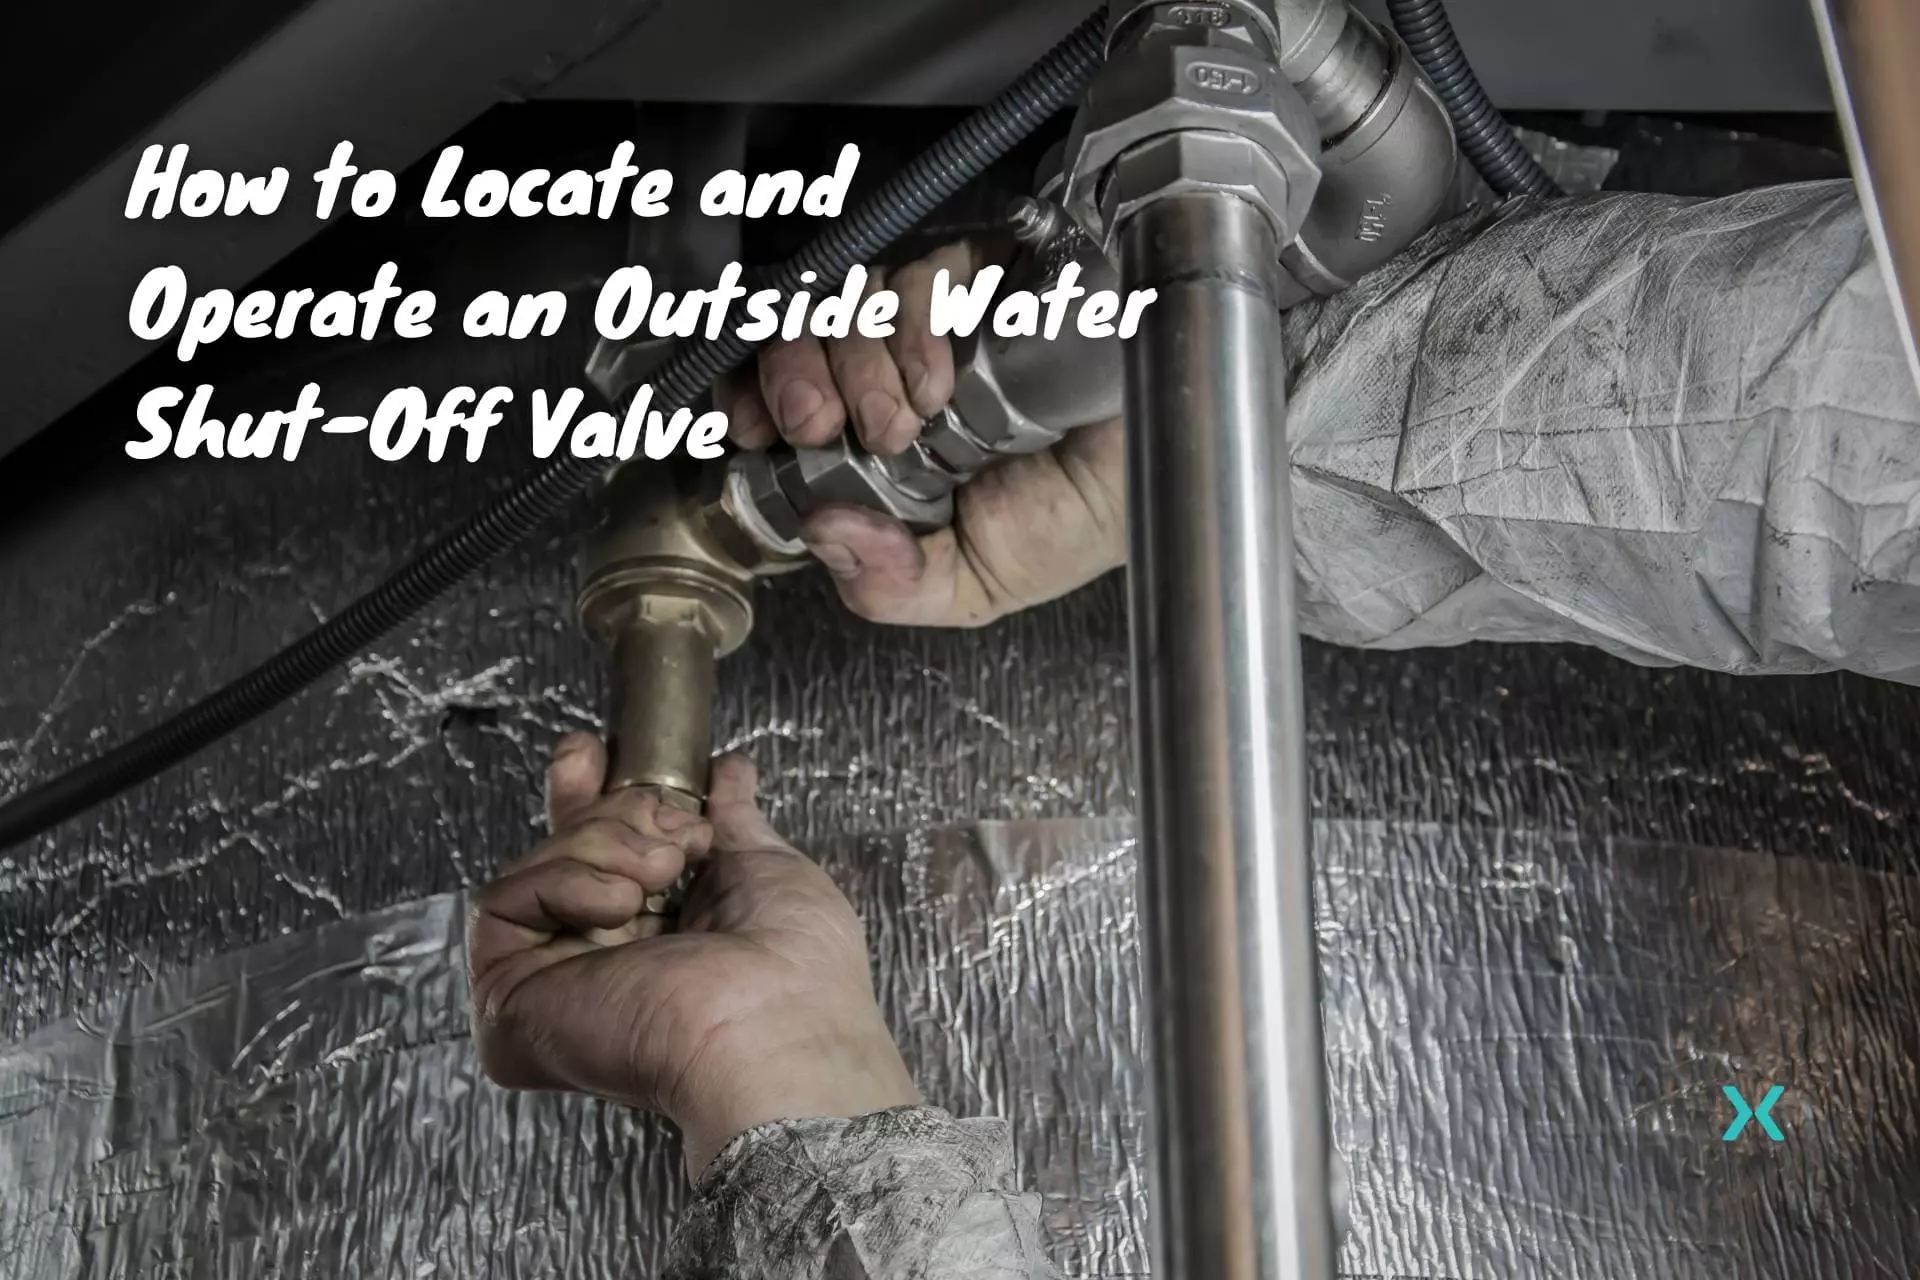
The repair process begins with completely shutting off your home's main water supply. This step cannot be overstated – attempting repairs on live plumbing systems risks extensive water damage and personal injury. Locate your main shut off valve, typically found near the water meter or where the main line enters your home. Turn the valve clockwise until it stops, then verify that water flow has ceased by opening a faucet at the lowest point in your home.
With the water supply secured, proceed to remove the valve handle by unscrewing the retaining screw. This exposes the valve stem and packing nut assembly. Using an adjustable wrench, carefully loosen the packing nut – this component seals the area where the stem passes through the valve body. If the nut is corroded or stuck, apply penetrating oil and allow it to sit for several minutes before attempting removal again.
Once the packing nut is removed, extract the valve stem by turning it counterclockwise. Examine the stem for signs of wear, particularly the washer or seal at its base. These components often deteriorate and prevent proper sealing. Replace any worn parts with new components that match the original specifications. Clean the valve body thoroughly, removing all mineral deposits and debris that could interfere with proper sealing.
Reassemble the valve in reverse order, taking care not to over-tighten any components. Apply plumber's tape to threaded connections to ensure watertight seals. Once reassembled, slowly restore the main water supply and check for leaks. If the repair was successful, the valve should operate smoothly without any water escaping when closed.
Testing and Verification
Eventually, something in your house will develop a leak, and you'll need to have a functional shut off valve to turn to. This reality makes testing your repairs absolutely essential. After completing the repair, conduct thorough testing to verify that the leak has been resolved and that the valve functions properly.
Begin testing by gradually opening the main water supply valve. Watch closely for any signs of leakage around the repaired valve and all connections. Use a dry tissue or paper towel to check for subtle moisture that might indicate incomplete sealing. Allow the system to pressurize fully, then check again after 10-15 minutes, as some leaks only manifest under sustained pressure.
Test the valve's operational functionality by opening and closing it several times. The valve should move smoothly without sticking or requiring excessive force. Listen for unusual sounds that might indicate internal damage or improper reassembly. If you detect any issues during testing, immediately shut off the main water supply and reassess the repair.
Preventive Maintenance and Regular Testing
Knowing where they're located (and regularly testing them to make sure they still work) can help you stay ready in a plumbing emergency. This proactive approach to plumbing maintenance can save you from significant headaches and expenses down the road. Regular testing and maintenance of shut off valves should be part of your home maintenance routine.
Establish a quarterly testing schedule for all shut off valves in your home. This includes main supply valves, fixture-specific valves, and any specialized valves for appliances like water heaters or irrigation systems. During testing, operate each valve through its full range of motion, checking for smooth operation and signs of wear or corrosion. Document the condition of each valve and any maintenance performed.
Preventive maintenance extends beyond simple testing. Clean valve components periodically to prevent mineral buildup, lubricate moving parts with appropriate products, and replace aging components before they fail. Consider installing water pressure regulators if your home experiences high water pressure, as excessive pressure accelerates valve wear and increases the likelihood of leaks.
Long-term Solutions and Upgrades
For homeowners dealing with recurring valve leaks or those living in older homes, long-term solutions may be more appropriate than repeated repairs. Modern valve technology offers significant improvements over older designs, including better materials, more reliable sealing mechanisms, and easier maintenance.
Consider upgrading to quarter-turn ball valves, which provide superior reliability and longevity compared to traditional compression valves. These valves use a rotating ball with a hole through its center to control water flow, eliminating many of the wear points found in older designs. While the initial investment is higher, the reduced maintenance requirements and improved reliability often justify the cost over time.
For homes with hard water issues, installing a whole-house water softener can dramatically extend the life of all plumbing components, including shut off valves. These systems remove minerals that cause scale buildup and corrosion, preserving the integrity of valve seals and internal mechanisms. The investment in water treatment often pays for itself through reduced maintenance costs and extended appliance lifespans.
Conclusion
Water shut off valve leaks represent more than just an annoying drip – they're a significant threat to your home's integrity, your wallet, and your peace of mind. Understanding the causes of these leaks, knowing how to identify and repair them, and implementing preventive maintenance strategies puts you in control of your home's plumbing health. While DIY repairs can resolve many common issues, recognizing when to call a professional ensures that complex problems receive appropriate attention.
Remember that plumbing systems require ongoing attention and maintenance. The small investment of time in regular testing and preventive care can prevent major emergencies and costly repairs. By staying informed about your home's plumbing systems and taking proactive steps to maintain them, you protect your investment and ensure reliable water service for years to come. Don't wait for a small leak to become a major problem – take action today to secure your home's plumbing future.